

LangGraph is like LEGO for AI workflows — click pieces together and you can build almost anything.
However, without structure, your masterpiece can quickly turn into a wobbly tower that collapses with the smallest change.

This Blog will show you how to avoid messy graphs and design clear, maintainable LangGraph workflows — using a simple analogy: a metro system.
Why LangGraph gets messy
Many projects start small, just one or two nodes. But they grow fast. Soon you find:
- One node is doing five different jobs
- The state dictionary is full of mystery keys
- Edges connect “just because it works”
The graph diagram looks like spaghetti
The result?
- A bug in one place breaks everything
- Debugging feels like playing Minesweeper
- Adding a new feature is risky and slow
The problem isn’t LangGraph itself — it’s workflow planning.

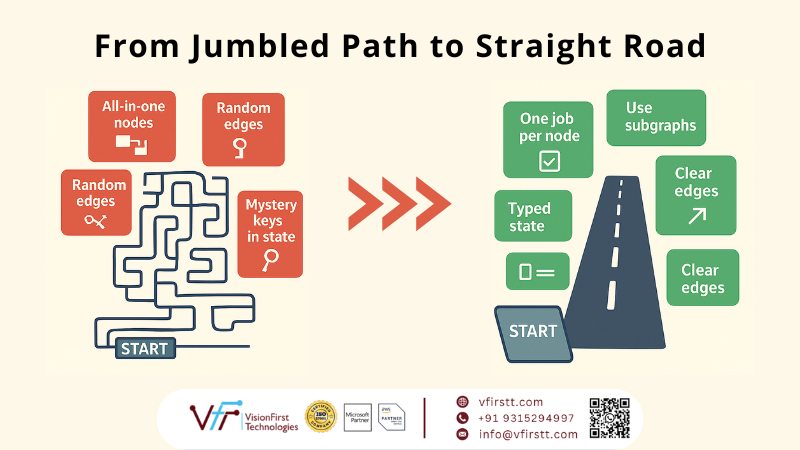
The common pitfalls
If your LangGraph looks like a tangle, it might be suffering from:
- All-in-one nodes that try to handle multiple tasks
- Untyped state that passes around mystery data
- Random edges added “just because it work”
- No visual hierarchy, where everything looks equally important
These patterns make graphs fragile and confusing.
From messy junction to metro style
When build workflows, it’s tempting to cram everything into one step. It works at first, but debugging and extending quickly become painful.
Think of your LangGraph like a metro system:
- Each station has one purpose
- Lines are clearly marked
- Transfers are obvious
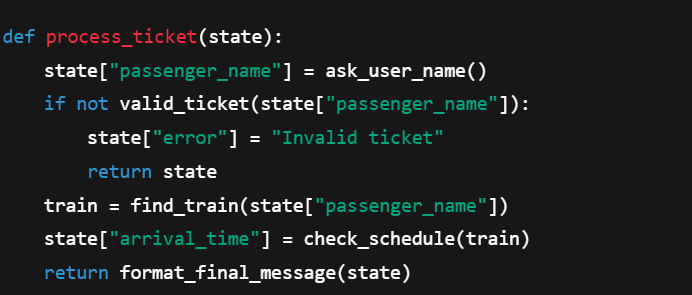
Messy Version — All-in-One Node
This single node tries to do everything:
- Collects user input
- Validates it
- Finds trains
- Checks schedules
- Formats the final message
It’s like a railway junction where every train arrives on the same track — delays and collisions guaranteed.
Clean Version — Metro Style
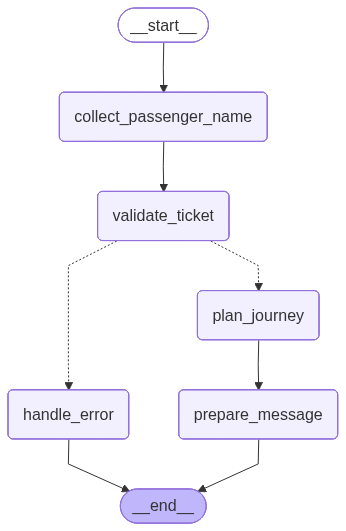
Break it into stations:
- Input Collection
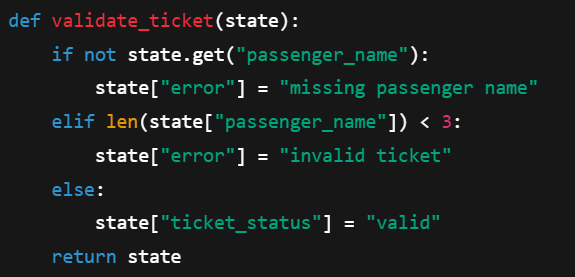
- Validation
- Core Processing
- Output Formatting
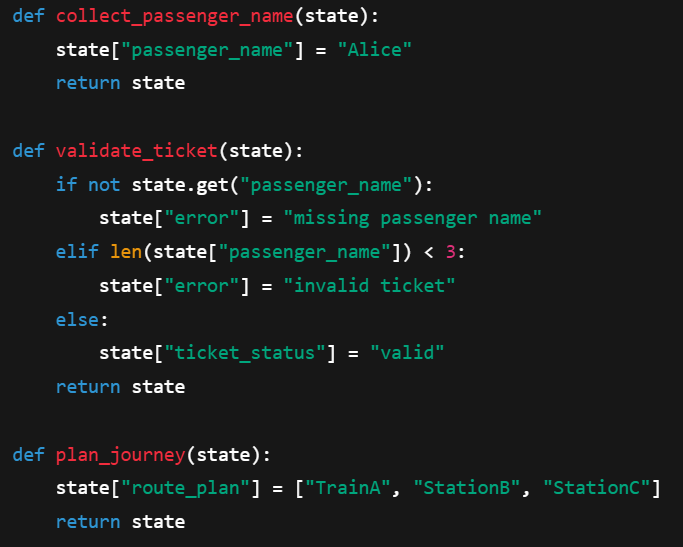
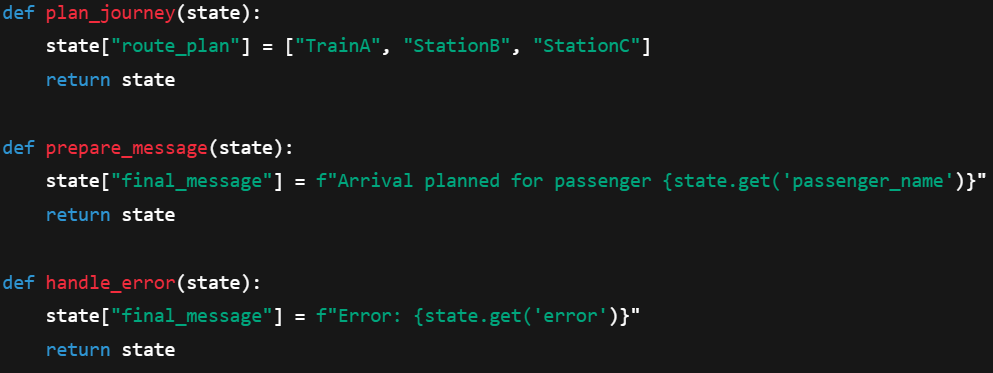
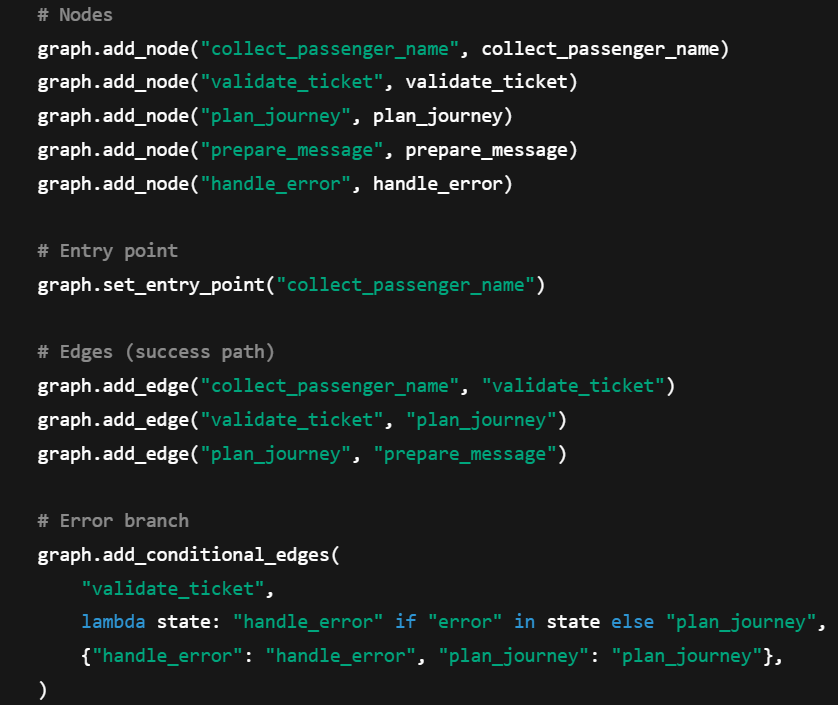
And wire them in LangGraph as separate nodes.
Why This Works
- Predictable flow → Easier to follow and reason about
- One job per node → Failures are easy to debug
- Easy to extend → Add new features without breaking old ones
- Swappable parts → Change one node without touching others
The metro approach to LangGraph
Here are four principles for designing graphs that scale.
1. Color the lines → Use subgraphs
In a metro map, each line has a purpose.
In LangGraph, group related stages into subgraphs:
- Input Collection
- Validation
- Core Processing
- Output Formatting
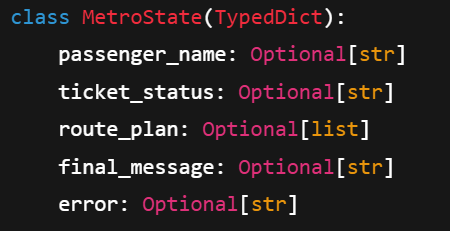
2. Keep a control center → Define typed state
A control room knows where every train and passenger is.
In LangGraph, a centralized typed state ensures consistent, reliable data flow:
3. One job per station → Single-responsibility nodes
- Nodes should do exactly one thing.
- This makes debugging, testing, and reusing much easier.
4. Clear transfer points → Well-defined edges
Transfers in a metro are simple.
In LangGraph, edges should only connect logically related nodes. No mystery jumps.

Metro rules for LangGraph
| Metro Rule | Why it works | LangGraph practice |
| Color the lines | Easy to see routes | Use subgraphs |
| Control center | Everything is tracked | Centralized typed state |
| One job per station | Smooth flow | Single-responsibility nodes |
| Clear transfers | No one gets lost | Well-defined edges |
| Public-friendly map | Anyone can onboard fast | Document your flow |
Quick Start Checklist
- Define the state schema before adding nodes
- Use 3–5 subgraphs for major stages
- Keep each node focused on one task
- Connect edges that tell a clear story
- Make your graph diagram readable to newcomers
Final Thought
A LangGraph can be a chaotic knot or a clean metro map.
The difference isn’t the tool — it’s the planning.
Design your graph like a city’s metro, and your workflows will run on time, every time.


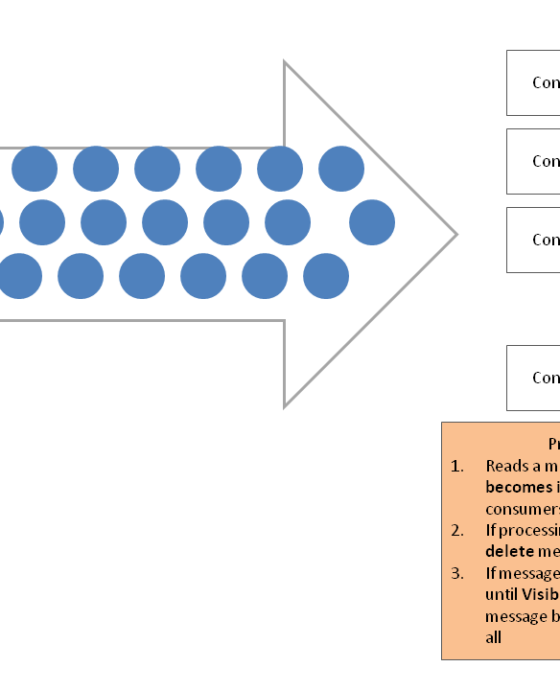
SQS Implementation of Consumer Group Concept of Kafka

AWS Lambda Excel Processing: Cut Costs 90% for Financial Data | BFSI Cloud Solutions